
The fastest way to build and test automation workflows without paying per execution is to install n8n locally. You get the full workflow editor, every built-in node, and complete control over your data, all running on your own machine at port 5678.
What You'll Learn
I run a local n8n instance for every client automation before it touches a server. Three reasons make the ten minutes of setup worth it:
- Zero execution costs: n8n Cloud bills by workflow executions. A local instance runs unlimited executions while you build and debug.
- Data privacy: API keys, customer records, and webhook payloads never leave your machine. That matters for GDPR work and client data under NDA.
- A safe sandbox: test custom nodes, Code node scripts, and environment variables without risking a production instance.
Quick answer: To install n8n locally, run
docker volume create n8n_data, then start the container withdocker run -it --rm --name n8n -p 5678:5678 -v n8n_data:/home/node/.n8n docker.n8n.io/n8nio/n8n. Openhttp://localhost:5678in your browser to create your owner account.
Docker vs npm: Which Method Should You Use?
There are two supported ways to install n8n locally: the official Docker image or the npm package on Node.js. Both give you the same editor and the same nodes. The difference is how each one sits on your system.
| Criteria | Docker (Recommended) | npm / Node.js |
|---|---|---|
| Setup difficulty | Moderate: requires Docker Desktop or Docker Engine | Easy: one global install command |
| System footprint | Heavier: Docker runtime plus a multi-hundred-megabyte image | Lighter: runs directly on Node.js |
| Isolation | Full: container sandbox, no dependency conflicts | None: shares your system Node.js version |
| Persistence | Named volume survives container removal | Stored in the ~/.n8n folder in your home directory |
| Best for | Developers, CTOs, production parity | Beginners, students, quick tests |
My verdict: choose Docker if the workflow will ever run on a server. The container you test today is the same image you deploy tomorrow.
Choose npm if you are still learning how to install n8n, working on a low-RAM laptop, or stuck on a locked-down college or office machine where Docker is not allowed.
How to Install n8n with Docker (n8n Self-Hosted Docker Setup)
Docker is the most reliable way to install n8n locally, and it is the method the n8n team recommends for self-hosting. The container bundles the correct Node.js version, so version conflicts disappear.
Step 1: Verify Docker Is Installed
Install Docker Desktop on Windows or macOS, or Docker Engine on Linux. Then confirm the Docker daemon is running:
docker --version
docker info
docker --version prints the client version. docker info confirms the daemon responds. If it returns an error, start Docker Desktop and wait until the engine shows as running.
Step 2: Create a Persistent Container Volume
docker volume create n8n_dataThis creates a named volume called n8n_data. Docker stores it outside the container filesystem, so your workflows, saved credentials, execution history, and encryption key survive restarts, removals, and image upgrades.
Skip this step and your data lives inside a throwaway container. Delete that container and everything goes with it.
Step 3: Run the n8n Container
docker run -it --rm \
  --name n8n \
  -p 5678:5678 \
  -e GENERIC_TIMEZONE="UTC" \
  -e TZ="UTC" \
  -e N8N_ENFORCE_SETTINGS_FILE_PERMISSIONS=true \
  -v n8n_data:/home/node/.n8n \
  docker.n8n.io/n8nio/n8n
What each flag does:
-it: runs the container interactively, so you see startup logs in your terminal.--rm: removes the container when you stop it. Your data stays safe in the volume.-p 5678:5678: maps host port 5678 to the container port 5678.-e GENERIC_TIMEZONEand-e TZ: environment variables that set the timezone for Schedule Trigger nodes and system time. Replace UTC with your own zone, such as America/New_York or Asia/Kolkata.-e N8N_ENFORCE_SETTINGS_FILE_PERMISSIONS=true: locks down file permissions on the n8n config file.-v n8n_data:/home/node/.n8n: mounts the persistent container volume at the n8n data directory.
Windows PowerShell does not accept backslash line breaks. Use this single-line version instead:
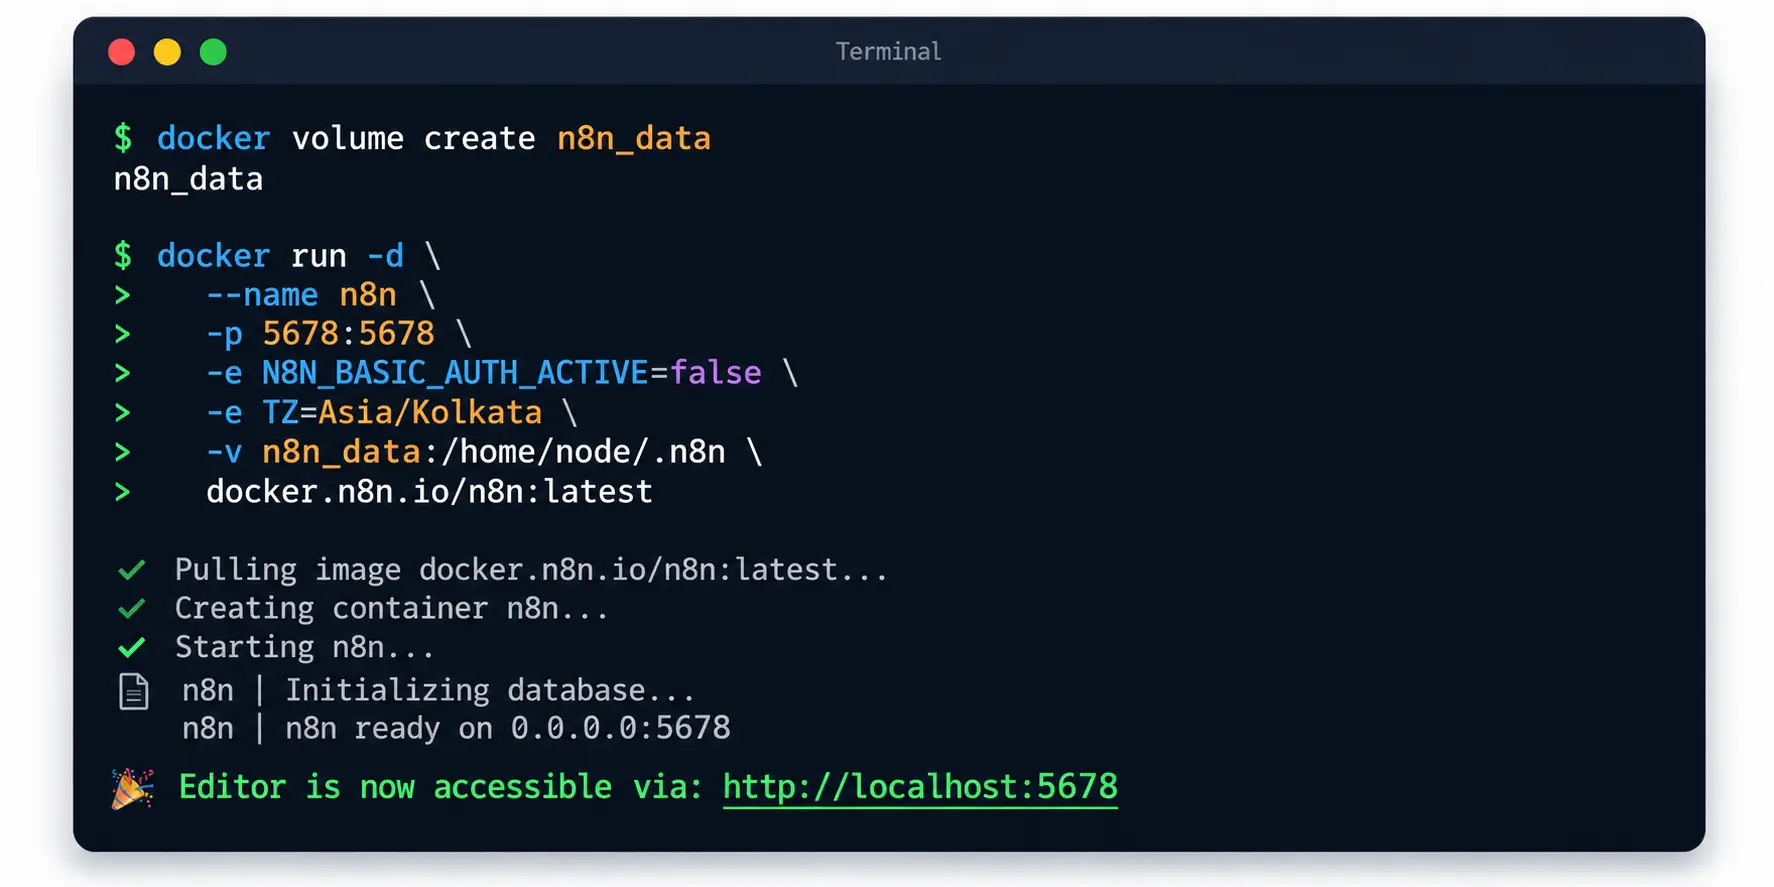
docker run -it --rm --name n8n -p 5678:5678 -e GENERIC_TIMEZONE="UTC" -e TZ="UTC" -e N8N_ENFORCE_SETTINGS_FILE_PERMISSIONS=true -v n8n_data:/home/node/.n8n docker.n8n.io/n8nio/n8nWhen the log prints Editor is now accessible via: followed by http://localhost:5678, n8n is ready.
Step 4: Run n8n in the Background (Detached Mode)
The interactive command ties n8n to your terminal window. For an instance that keeps running after you close the terminal, stop the Step 3 container with Ctrl+C and use detached mode:
docker run -d --restart unless-stopped --name n8n -p 5678:5678 -e GENERIC_TIMEZONE="UTC" -e TZ="UTC" -e N8N_ENFORCE_SETTINGS_FILE_PERMISSIONS=true -v n8n_data:/home/node/.n8n docker.n8n.io/n8nio/n8n-d runs the container in the background. --restart unless-stopped brings n8n back after a reboot unless you stopped it yourself. Use docker stop n8n and docker start n8n to control it.
Optional: Docker Compose Setup
For teams sharing one configuration, a compose file keeps every setting in version control. Create a file named compose.yaml:
services:
  n8n:
    image: docker.n8n.io/n8nio/n8n
    container_name: n8n
    restart: unless-stopped
    ports:
      - "5678:5678"
    environment:
      - GENERIC_TIMEZONE=UTC
      - TZ=UTC
      - N8N_ENFORCE_SETTINGS_FILE_PERMISSIONS=true
    volumes:
      - n8n_data:/home/node/.n8n

volumes:
  n8n_data:
    external: true
Start it from the same folder:
docker compose up -dexternal: true tells Compose to reuse the n8n_data volume from Step 2 instead of creating a new, empty one with a project prefix.
How to Update n8n in Docker
docker pull docker.n8n.io/n8nio/n8n:latest
docker stop n8n
docker rm n8n
Then rerun the Step 4 command. The new container attaches to the same n8n_data volume, so every workflow and credential carries over. With Compose, run docker compose pull followed by docker compose up -d.
How to Install n8n with npm (Node.js Method)
The npm method installs n8n as a global node package and runs it directly on your system Node.js. It is the quickest route if you already write JavaScript and want to install n8n locally without Docker.
Prerequisite: Check Your Node.js Version
Warning: n8n requires Node.js 20.19 or later, up to Node.js 24.x. Versions outside this range fail during installation or crash on startup. Check your version before you install n8n locally.
node -v
npm -v
If node -v prints v20.19.0 or higher and lower than v25, you are ready. Anything else, fix it in Step 1.
Step 1: Install a Supported Node Version with nvm
nvm (Node Version Manager) lets you switch Node versions per project without touching your system install. Get nvm for macOS and Linux or nvm-windows, then run:
nvm install 22
nvm use 22
Node 22 is an LTS release inside the supported range. nvm also installs global packages inside your user directory, which prevents the EACCES permission errors common with system-wide npm.
Step 2: Try n8n Instantly with npx
npx n8nnpx downloads n8n into a temporary cache and starts it without a global install. Use it to test drive the editor. The first run takes a few minutes while npm fetches dependencies.
Step 3: Install n8n Globally
npm install n8n -gThe -g flag installs n8n globally and adds the n8n command to your PATH. The dependency tree is large, so expect the install to take several minutes.
Step 4: Start n8n
n8n startn8n stores workflows, credentials, and settings in the .n8n folder inside your home directory: ~/.n8n on macOS and Linux, C:\Users\YourName\.n8n on Windows. Back up that folder and you have backed up the entire instance.
To run on a different port, set the N8N_PORT environment variable before starting:
# macOS / Linux
export N8N_PORT=5679
n8n start

# Windows PowerShell
$env:N8N_PORT=5679
n8n start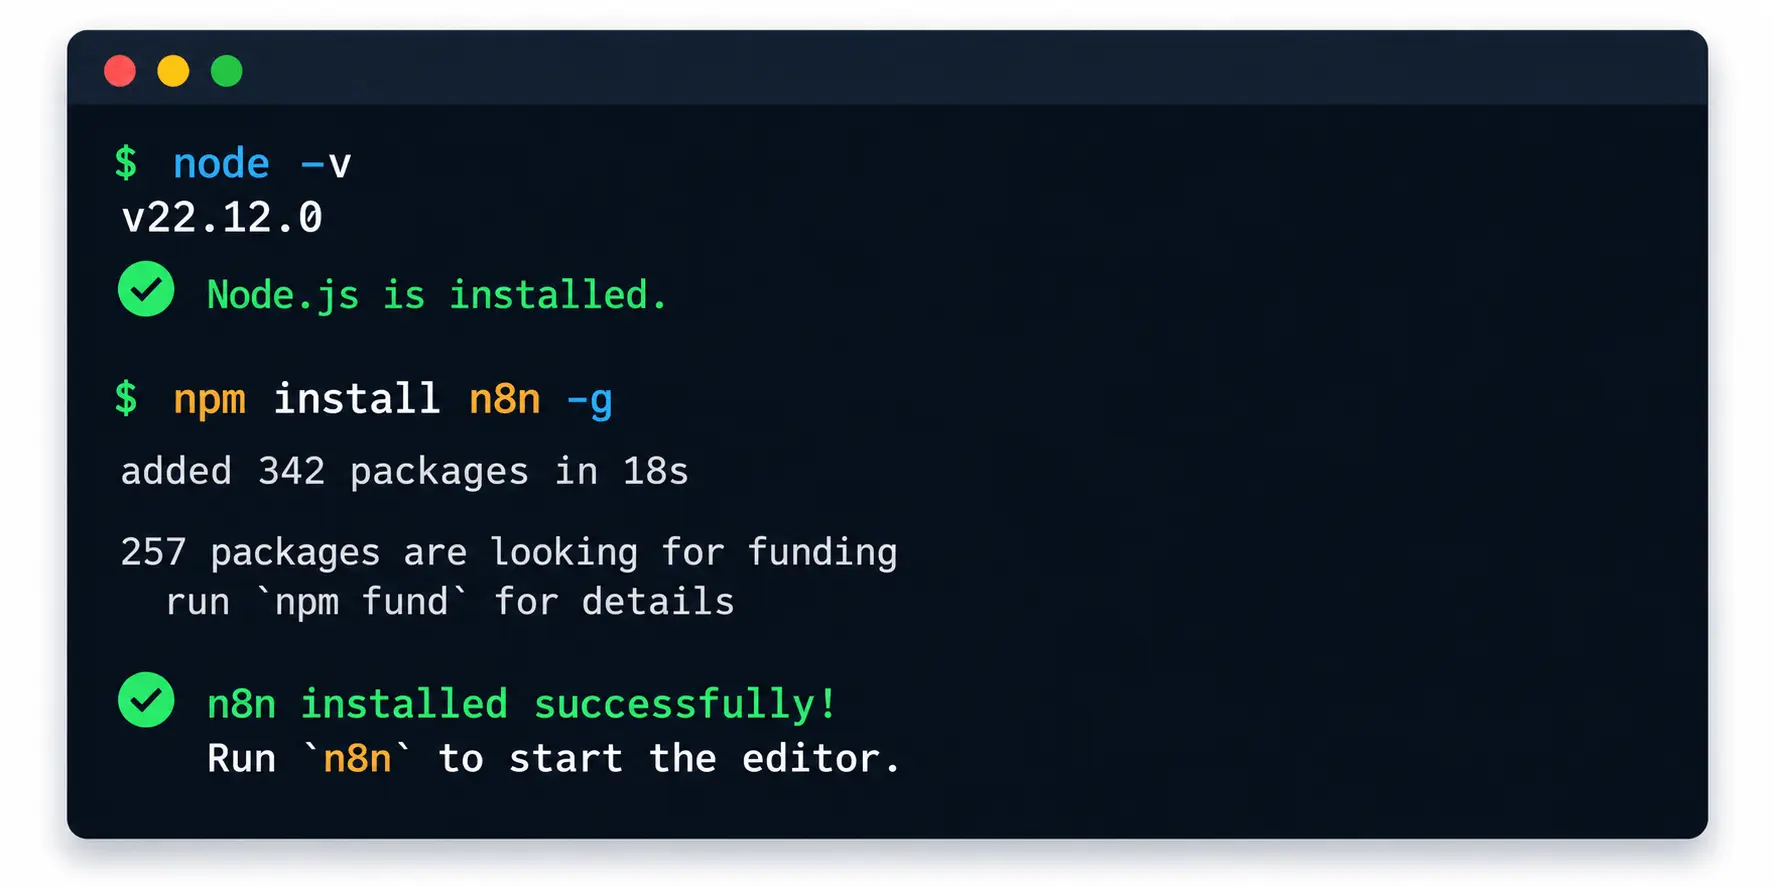
How to Update n8n via npm
npm update -g n8nRun n8n start again after the update. Your data in ~/.n8n stays in place.
Run n8n on Localhost: Verify Your Installation
Whichever method you used to install n8n locally, verification takes under a minute.
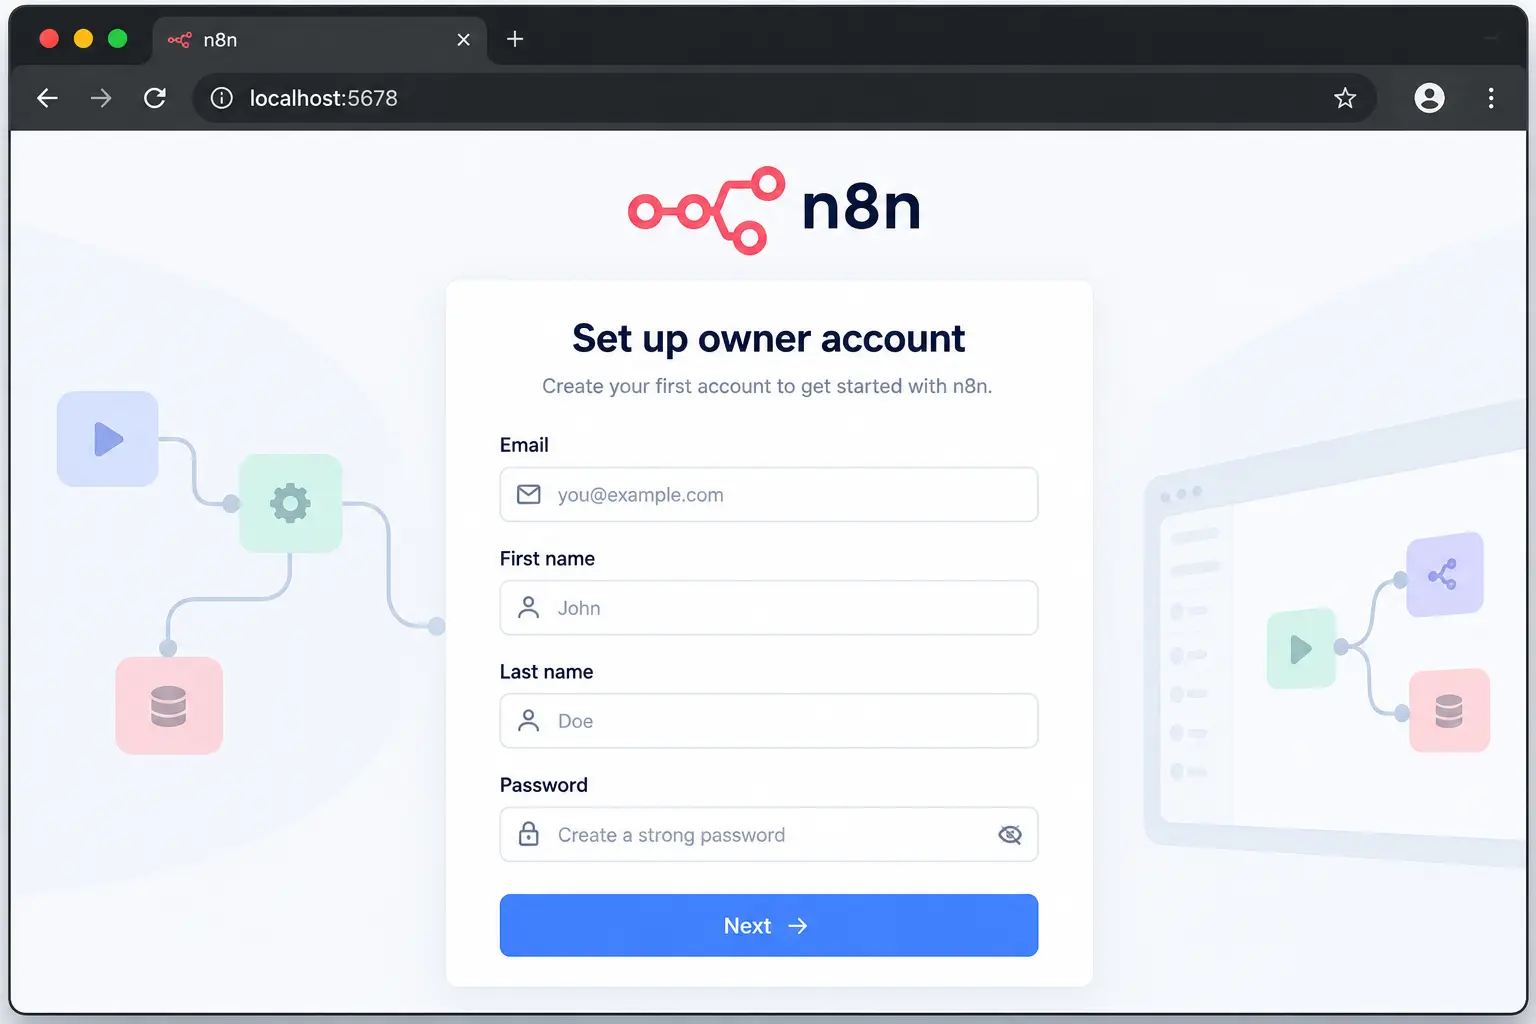
- Open the editor: go to
http://localhost:5678in your browser. The first visit shows the owner account setup screen. Create your account with your email, first name, last name, and a password. This account exists only on your instance. - Check the container status (Docker only): the n8n container should show a status of Up with port 5678 mapped.
docker ps - Watch the live logs:
docker logs -f n8n - Hit the health endpoint:
curl http://localhost:5678/healthzExpected response:
{"status":"ok"}
Once the workflow canvas loads after sign-up, you have successfully managed to run n8n on localhost. Build a quick test with a Manual Trigger and an Edit Fields node to confirm executions complete.
Once executions run, n8n becomes the automation layer for AI agents. If WordPress is part of your stack, see how to connect an AI agent to WordPress using an MCP server.
Troubleshooting Common Local n8n Errors
These three errors cover most failed attempts to install n8n locally.
1. Port 5678 Is Already in Use
You will see n8n's port 5678 is already in use with npm, or Bind for 0.0.0.0:5678 failed: port is already allocated with Docker. Another process, often an older n8n instance, holds the port. Find it:
# macOS / Linux
lsof -i :5678

# Windows
netstat -ano | findstr :5678
Stop that process, or switch ports: use -p 5679:5678 for Docker or N8N_PORT=5679 for npm, then open http://localhost:5679.
2. Docker Permission Denied
On Linux, permission denied while trying to connect to the Docker daemon socket means your user is not in the docker group. Add it:
sudo usermod -aG docker $USER
newgrp docker
If you use a bind mount (a local folder) instead of a named volume and hit EACCES errors on /home/node/.n8n, remember the container runs as user ID 1000. Give that user ownership of the folder:
sudo chown -R 1000:1000 ./n8n-data3. Secure Cookie Error on a LAN IP
Opening n8n from another device at http://192.168.x.x:5678 triggers a secure cookie warning, because n8n expects HTTPS for anything other than localhost. For local network testing only, disable the check:
-e N8N_SECURE_COOKIE=falseAdd that flag to your docker run command, or run export N8N_SECURE_COOKIE=false before n8n start. Never use this on a public server. Put n8n behind a reverse proxy with SSL instead.
For every configuration option, the official n8n Docker installation docs and n8n npm installation docs are the source of truth.
Frequently Asked Questions
Is n8n free to run locally?
Yes. When you install n8n locally, the self-hosted edition is free for personal projects and internal business use under the n8n Sustainable Use License, with no limit on workflows or executions. Paid plans add enterprise features such as SSO and advanced user permissions.
What Node.js version does n8n need?
n8n requires Node.js 20.19 or later, up to Node.js 24.x. Docker users do not need to install Node.js at all, because the official n8n image ships with the correct version.
Do I lose my workflows when I stop the Docker container?
No, as long as you mount a persistent volume with -v n8n_data:/home/node/.n8n. The volume keeps your workflows, credentials, and encryption key even after the container is removed.
Can I access local n8n from another device on my network?
Yes. Open http://YOUR-LAN-IP:5678 on the other device and set N8N_SECURE_COOKIE=false for local testing. If the connection times out, allow port 5678 through your firewall.
How is local n8n different from n8n Cloud?
A local instance runs on your own hardware with no execution fees and full control over your data, but it stops when your computer sleeps or shuts down. n8n Cloud is hosted, always online, and billed by workflow executions.
Take Your n8n Workflows from Localhost to Production
When you install n8n locally, you get the place where workflows get built. Production is where they need SSL, a reverse proxy, queue mode with Redis workers, and automated backups. That is a different job.
PHP Youth builds and manages self-hosted n8n deployments, custom web applications, and the marketing automations that run on them for clients in India, the US, and worldwide. If you want your workflows running reliably on your own server, talk to our team about what you are automating.
Contact PHPYouth
Discover more from Master WordPress with Free Tutorials & Guides
Subscribe to get the latest posts sent to your email.